 I did something last week that I haven’t done in a very long time! and boy was it good!
Having my nails done in a salon by a professional felt like the ultimate pampering for this busy working mum.
I was waited on hand and foot and served mini biccies on a mini tray with a perfect mini espresso while my battered hands, tired nails and gnarly cuticles were rubbed, pushed, filed and lovingly restored within an inch of their life!
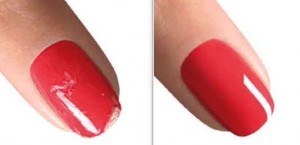
The result? high gloss, Shellac nails that I can’t stop showing off!
I have never been one to look after my nails I don’t bite or pick but they just don’t seem to grow although when I was pregnant I had magnificent talons that wouldn’t stop growing!
I was worried that gel nails would damage my own nails and stop them from growing even more but my brilliant nail technician assured me that the protective coating would actually help my nails to grow underneath and stop them from splitting and tearing.
Since the invention of nail polish the beauty industry has tried to find new ways of making manicures last longer so are gels and Shellac the answer?
Gel manicures can reshape your nails and help to strengthen them, all while maintaining your polish for significantly longer than a regular manicure. A technician buffs down the entire nail and paints very thin coats of gel over them, drying each coat under a UV dryer. Shellac manicures created by Creative Nail Design are a hybrid of gel manicures. For this type, technicians use a coloured gel, providing a chip-free manicure for up to 14 days. First, the technician rubs alcohol over each nail and applies a specialized UV base coat, allowing it to cure under a UV dryer. Then, two coats of gel nail polish are applied, followed by a clear gel topcoat. As with the traditional gel manicure, each coat is cured (like a ham!) under a UV dryer before the technician applies the next coat.
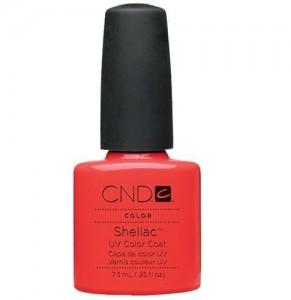 My Shellac nails cost 18 pounds and if you have your nails redone at most salons you usually get a gel soak off for free. I chose a vibrant coral colour with a touch of sparkle one finger caked in glitter caviar for added glitz.
I have to say I love the high-gloss finish the gel manicure gives you and as I am constantly washing, cleaning up and basically handmaiden to my busy toddler the fact they don’t chip is a massive bonus! I have had them for 7 days now and they are still looking brand new!
I think I have fallen in love with this salon treatment and it could be my new obsession sorry false individual lashes, I loved you but it’s time to make way for the new kid on the block!
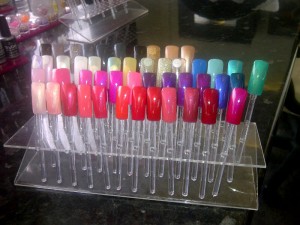 I am hoping my next dalliance will be with the seductive-sounding Velveteen manicure. my manicurist told me all about this A-lister manicure which gives your nails a velvet finish and again lasts up to 2 weeks.
And seeing as Rhianna is a fan that’s good enough for me!
Salon tip at home: When applying a top coat take the brush on to the reverse of your nail to “seal” the edge of your manicure. I love Sally Hansen Mega Shine Extended wear top coat (6.95 from Boots).
But what if you can’t afford to Shellac out (!) for a salon manicure, well, Beauty hunter Rachel Moses-Lloyd, aged 29, from Llansamlet, has come up with a much cheaper way of getting uber-cool nails without breaking the bank.
Here is her step by step guide to a DIY nail makeover at home!
Here’s how to get a summer flower:
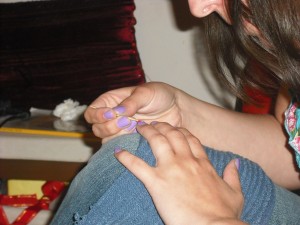 Step 1: Fill a bowl with warm soapy water and squeeze Nails Inc Striptease cuticle stripper (10 pounds for 15ml tube) on the base of each nail, then soak in the water for two minutes. After two minutes, push the cuticles back with an orange stick.Repeat on your other hand, then use Champney’s Hand Softening Scrub (6 pounds for 75ml in Boots) on both hands to exfoliate and help get rid of those stubborn bits of cuticle.
Step 2: File and buff nails, never use a metal nail file, but acrylic is great. Put cuticle oil (I used a Cosmopolitan one I had in a set bought for Christmas, but Nails Inc’s Vitamin E oil pen is great. 12 pounds) around base of nail and rub in.
Step 3: First, it’s basecoat time. I managed to pick up a new basecoat and topcoat last week. Rimmel’s 5 in 1 varnish (4.59 in Boots, Rimmel polishes were on offer, three for two) was easy to put on, and I didn’t have to faff with an extra bottle for my topcoat, it was all in the same one!
Step 4: Your main shade. I used Rimmel’s Salon Pro in shade 312, Ultra Violet (4.49 a bottle again on three for two, don’t you just love offers?). The brush when I initially opened the bottle looked a bit weird, it’s a bit angled all through, and quite chunky, but it was actually really easy to use.
When painting, don’t start from the very base of your nail, but from about two-thirds of the way down and in the centre, then gently push down, before pulling the brush back up over your nail. It ensures a nice even finish all along and on the base not all over your finger. Most polishes do require a second coat, but use your initiative. Leave to dry.
Step 5: This is the tricky part, and the part I used my imagination for, while I was sitting watching TV one night. I love to do my nails in front of the telly, it’s relaxing.
For the flower, you can use specialist nail brushes and stencils of course, but this is my budget way of creating a look you could pay a good few quid for in a salon (though it is nice to have a treat sometimes). I used cocktail sticks to paint the delicate nail art. You can paint the flower on any finger you want, or on all of them if you have more patience than me. I decided to go with current trends, and just paint it on one finger the one next to my little finger.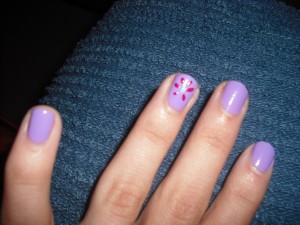
Begin by using a different colour for the centre of the flower, than what you’ll be using for the petals. I used Rimmel’s Salon Pro in shade 500, Peppermint (again, 4.49 but free in my three for two!). The easiest way to ensure you just get it on the tip of the cocktail stick is to turn the lid off, and turn it upside down, so the brush is sticking up in the air. Then take your cocktail stick, and run it up inside the brush.Don’t put too much on, but you need a bit of a blob on the tip of the stick, to ensure you get a nice circle on your nail.
Place the cocktail stick where you want the centre of your flower to be, your centre can be as big or as small as you want, but you need to ensure you have room for the petals.
Step 6: Petals. I used Boots Natural Collection polish, shade Hibiscus (1.89 a bottle) it was on three for 5 pounds at the time, but I’d already bought enough!). This time, you can get the polish a bit further up than on the tip, to help make the petal easier.Press the side of the stick down on your nail, and around the centre five or six times, depending on how many petals you want. It can be a little bit awkward to make sure you’ve got the positioning right, but all you need is some time.
Repeat steps 5 and 6 on your other hand.
Step 7: Wait for your flowers to dry (and admire then as they do!), then it’s time to put your topcoat on. As I said, I managed to find a 5 in 1 with my Rimmel clear coat, but there are thousands of different kinds of base and topcoats out there. I especially love the Nails Inc Dry Caviar Treatment pack for dry to normal nails. At 25 pounds, it includes Kensington Caviar Base Coat, Caviar 45-second top coat along with a cuticle oil pen, express remover wipe and a four-way buffer. My sister bought it for me as a birthday present one year, and when I’m feeling a bit flush (or there’s a sale on) I will get another set.
And ta-daah homemade nail flowers!
Blog Post: Emma Bryant, Beauty Blogger for Cosmedic Coach
Follow Emma on Twitter: @bbygrove
